
Lab 01 — Text to Speech: step-by-step workshop
Português · Workshop index · Lab 02 →
This workshop does more than explain the architecture. You open a terminal, create the project, create every file, paste a complete implementation, run a checkpoint, and only then continue.
When you finish, you will have a Next.js application that:
- turns text into audio with
gpt-4o-mini-tts; - keeps
OPENAI_API_KEYon the server; - validates text, voice, format, instructions, and speed;
- forwards the audio stream;
- provides playback, cancellation, and download;
- handles errors without leaking internal details;
- has tests that make no paid requests;
- can be deployed to Vercel.
Start in 5 minutes
If you already have an API key and want to see the finished solution before building, open a terminal in your projects directory and run:
git clone --depth 1 https://github.com/glaucia86/openai-voice-playground.git
cd openai-voice-playground/labs/lab-01-text-to-speech
npm ci
cp .env.example .env.local
npm run dev
On Windows PowerShell, replace cp .env.example .env.local with Copy-Item .env.example .env.local. Before npm run dev, open .env.local, add your key after OPENAI_API_KEY=, and save. Visit http://localhost:3000, use one short sentence, and make only the request you intend to pay for.
Would you rather build it?
- With guidance (recommended): use the starter branch and the first checkpoint.
- From an empty directory: open Chapter 1 and choose Path C.
- Finished code: inspect the
mainimplementation without replacing your work.
See the outcome before building
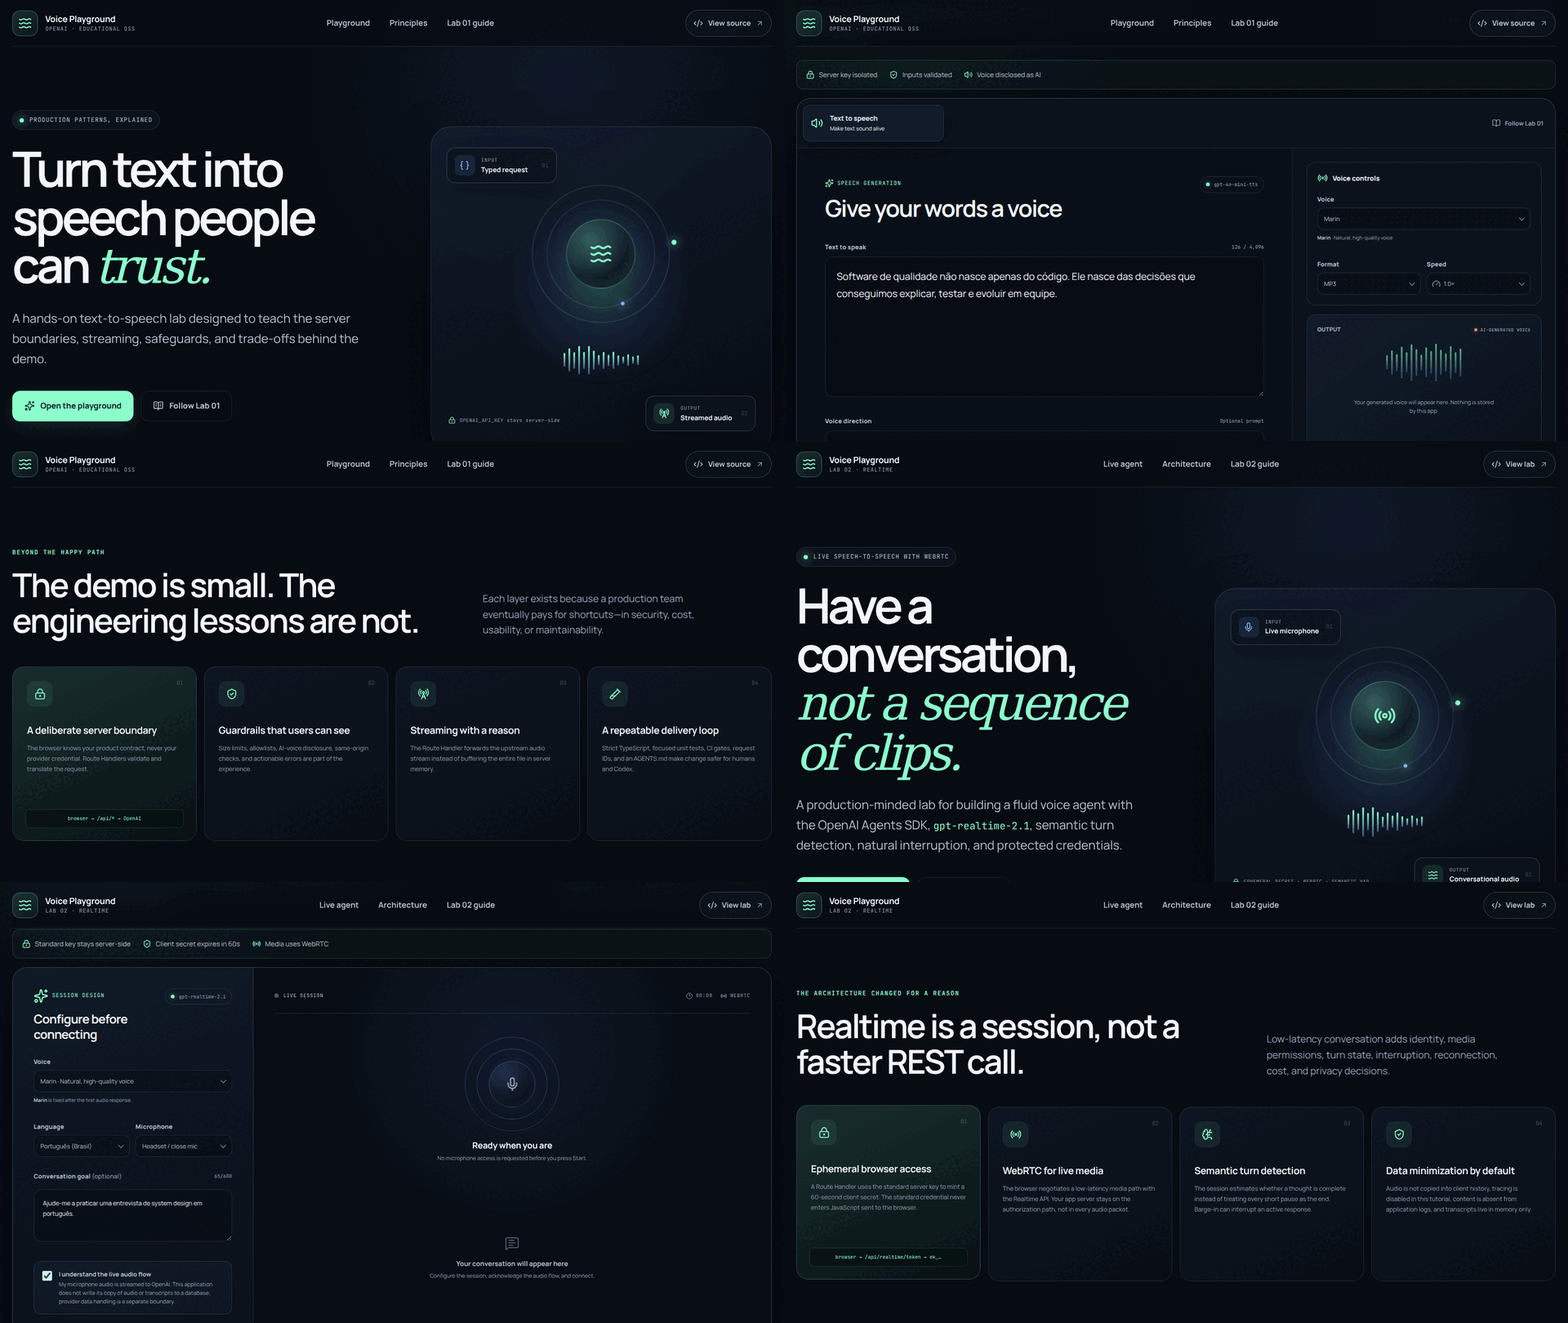
The reduced-motion text equivalent is: the learner enters text, selects a voice and format, submits the request, waits through the processing state, and receives controls to play or download the audio.
Architecture on one screen
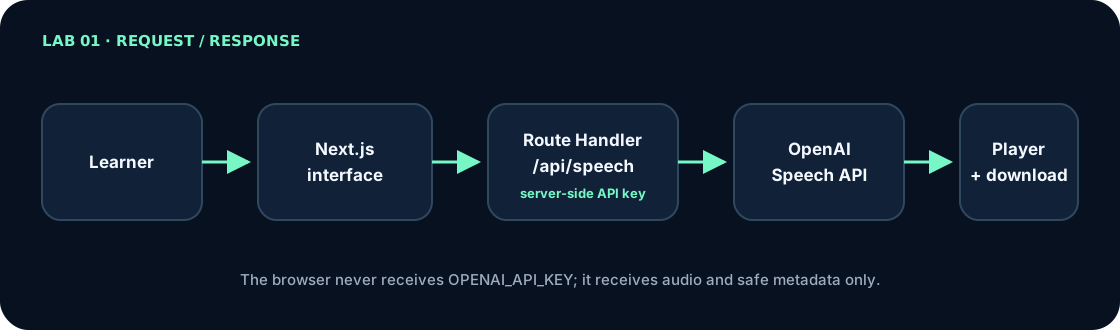
The interface runs in the browser and sends only allowed fields to /api/speech. The Route Handler runs on the server, validates the body, applies origin, access, and quota checks, uses OPENAI_API_KEY to call the Speech API, and forwards the stream. The browser receives audio and safe metadata—never the standard key. Local limits help during the workshop; production still needs real authentication, distributed rate limiting, budgets, and content-free observability.
Comprehension prompt: why does the browser receive audio but must never receive
OPENAI_API_KEY?
Choose a learning path
| Path | What you do | Recommendation |
|---|---|---|
| A — run and study | clone main and inspect the finished solution |
useful for seeing the result first |
| B — build from the starter | begin with a compilable scaffold and implement each slice | recommended for this workshop |
| C — create from zero | create directories, configuration, and dependencies too | useful for deep study or a longer class |
The workshop guide explains how to preserve your work and inspect checkpoints with git diff and git show.
Start here
Follow these chapters in order. Each one ends with objective completion evidence.
- Prepare the account, terminal, and project — Choose a path, verify tools, protect the API key, and prove the base runs.
- Build the application file by file — Create configuration, contract, backend, streaming, interface, and tests with the complete content of every file.
- Run, diagnose, and deploy — Run every gate, perform a controlled smoke test, troubleshoot common failures, and publish.
Want deeper reasoning? Read the Lab 01 architecture article after or alongside the hands-on chapters. The article explains why; the chapters above tell you exactly what to do.
Recommended starter
Open a terminal in your projects directory and run:
git clone --branch workshop/lab-01-v1-starter \
  https://github.com/glaucia86/openai-voice-playground.git
cd openai-voice-playground
git switch -c my-lab-01-solution
npm ci --prefix labs/lab-01-text-to-speech
npm run check:lab01
The first gate must pass without an API key or OpenAI request. Then open Chapter 1.
Recovery checkpoints
| After completing | Reference | Compare |
|---|---|---|
| initial base | workshop/lab-01-v1-starter |
starting point |
| contract and schemas | workshop/lab-01-v1-step-01-contract |
view diff |
| backend and streaming | workshop/lab-01-v1-step-02-server |
view diff |
| interface and tests | workshop/lab-01-v1-step-03-interface |
view diff |
Do not check out a checkpoint with unsaved changes. Commit your work on your own branch first, then use the reference for comparison.
Before continuing, confirm that: you chose one of the three paths, understand that API use may cost money, have Node.js 22+, and can explain where the API key will stay.
Final evidence
The lab is complete when both commands finish cleanly:
npm run check:lab01
git status -sb
The first command runs lint, TypeScript, tests, and a production build. The second should show only your branch, with no .env.local, .next, node_modules, or unexpected tracked files.